Our new publisher interface training series will equip you with all of the tools, tips and best practices needed to make your first sale within one month of joining our network. First, let's review how to complete your publisher profile.
Following the approval of your publisher application to Awin, your profile will need to be filled out. Only 100% complete profiles are visible to advertisers in the publisher directory, so this is very important as an incomplete profile could prevent you from joining advertiser programs.
Overview tab
To view and edit your profile, hover over the Account tab and under Profile, click Overview.
Adding a full business description
The first step is to add a description of your company, blog, website, or whichever outlet(s) you will be using to promote Awin advertisers.
In your profile you will see four tabs above your description: Overview, Documents, Promotional Spaces, and Performance. To add a description, first make sure the Overview tab is selected. Then you will need to do the following:
- Click on the text under Description
- Entered a fully-detailed description of your publisher business
- Click on the green check mark icon to save
Uploading a profile picture
Next, you need to add a profile picture. This can be a company logo, a picture of you, or whatever image you feel would best represent your publisher account. To add a profile picture:
- Click in the grey image box over your company name
- Select a picture to upload by following the on-screen instructions
- Click Save
Adding links
On the left side of your profile, you will see a box titled Links. This is where you will enter your website, blog URL, Twitter username, or Facebook page.
- Click on the pencil icon in the Links box to start editing
- Enter any relevant links
- Click Update Details to save
Completing your contact details
Directly under the Links box is the Contact box. Please confirm your contact details and make any necessary changes.
Documents tab
The next tab within your profile is the Documents tab. This is where you will upload any relevant documents like media kits, member statistics, campaign overviews, or brand presentations.
Uploading a document
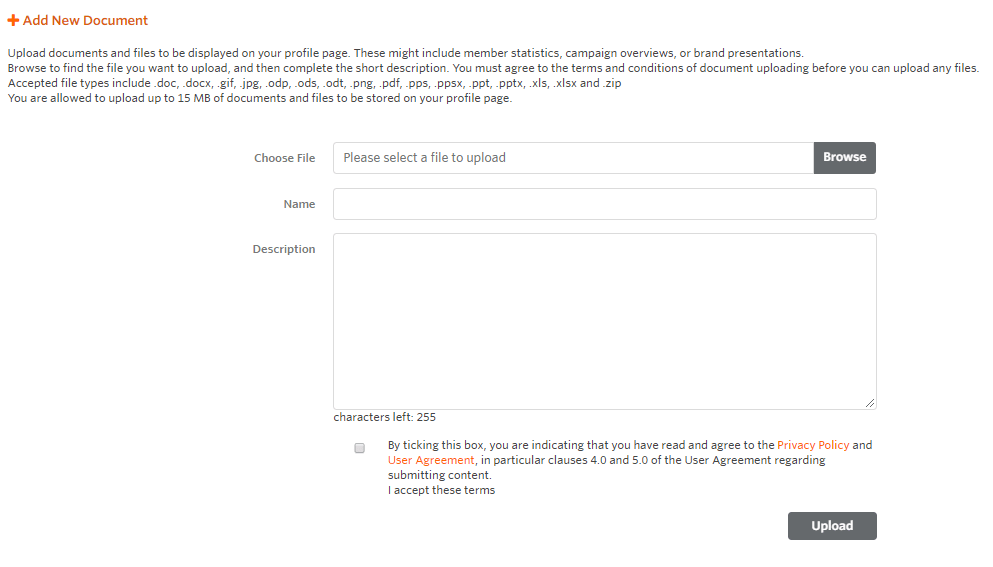
To upload a new document, first make sure the Documents tab is selected. Then you will need to do the following:
- Click Browse and choose the file you wish to upload (make sure the format matches one of those accepted)
- Add a name to the file in the Name field
- Provide a description so advertisers wishing to look at the file will understand what they are looking at
- Click the checkbox to agree to the Privacy Policy and User Agreement
- Click the Upload button
Once a document has been uploaded, it will appear in a list on the Documents tab and can be viewed at any time. Other publishers cannot view these documents.
Promotional Spaces tab
Another tab within your publisher profile you’ll need to complete is the Promotional Spaces tab. This is where you will display how you will be promoting advertisers.
Adding promotional types
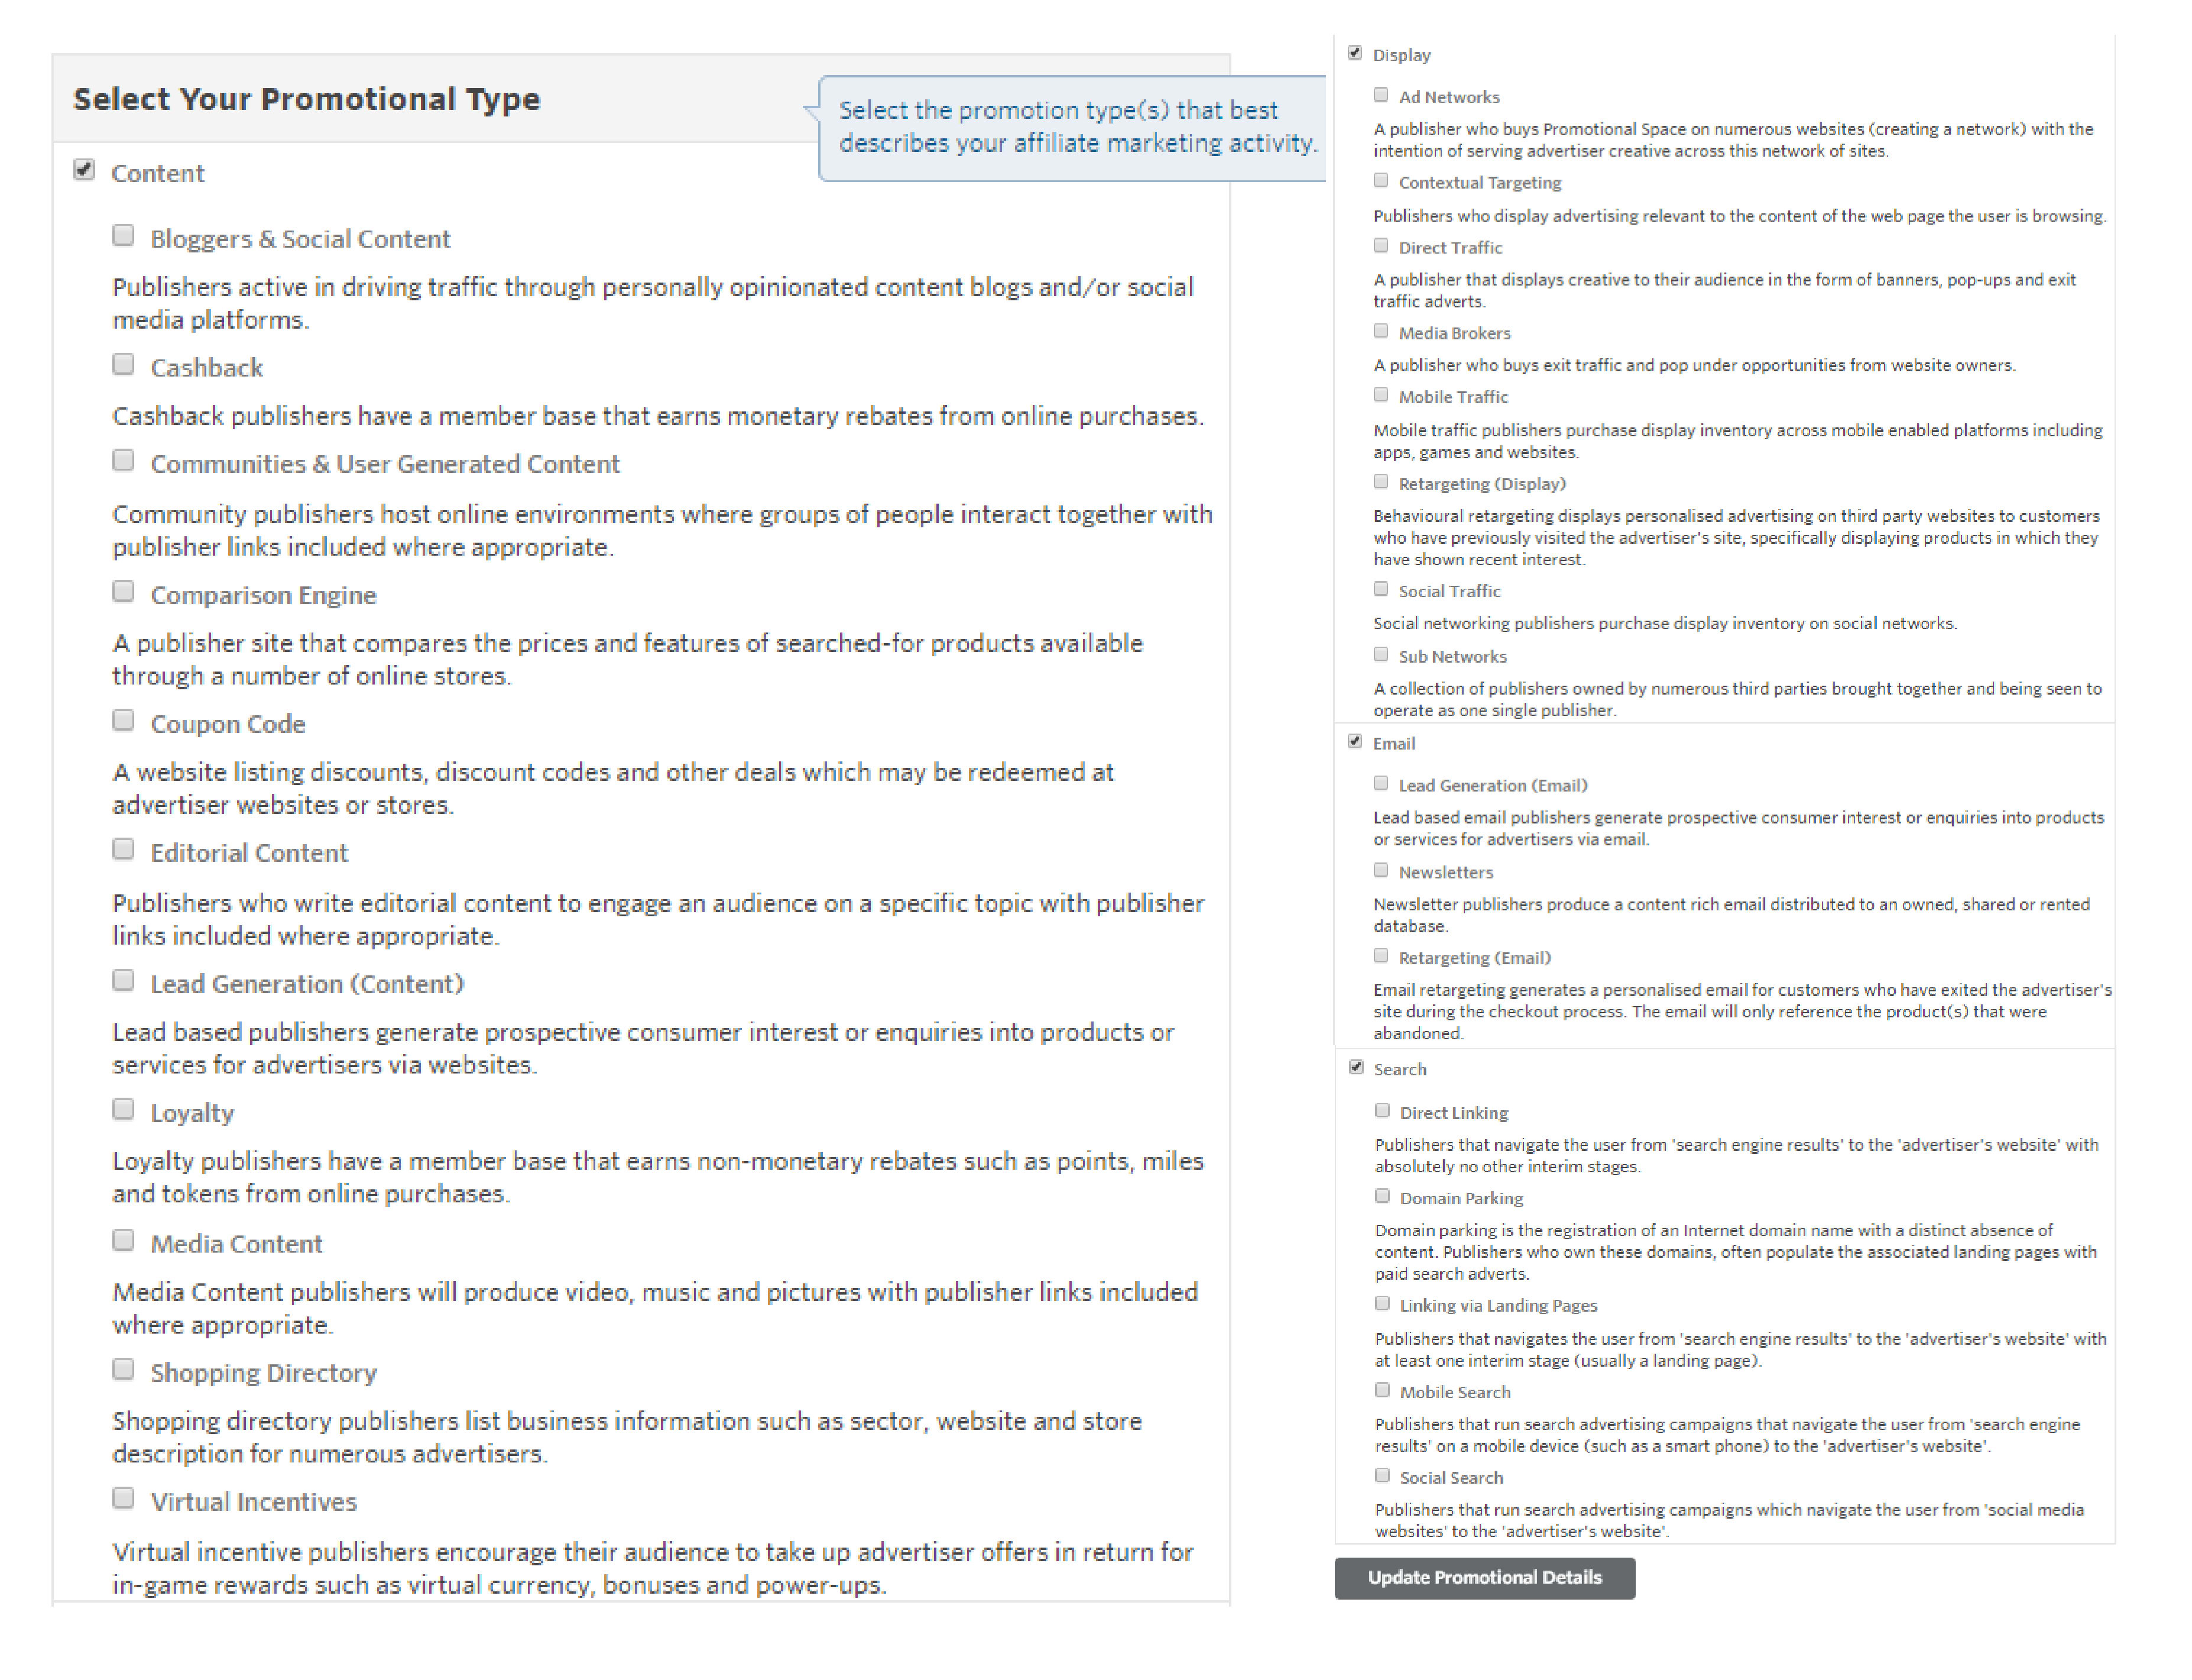
Adding a promotional type is important as it is an easy way for advertisers to identify what promotional methods you use. You may select as many promotional types as are applicable to you, and then set one as your primary promotional type. To add promotional types:
- Click Edit Promotional Settings on the line beneath the tab
- On the page that follows, select any promotional types that are applicable to you (make sure to specify a primary promotional type)
- When finished, click Update Promotional Details to save
Adding a URL to profile
After you have selected your promotional types, the final step to completing your profile is to add the URL of any site you will be using to share advertiser promotions. Within the Promotional Spaces tab:
- Click Add Content Site (depending on your promotional types, this may say Add Display Activity, Add Email Activity, or Add PPC Campaign)
- Enter your website URL in the box next to Promotional Space URL
- Enter a description of your website in the box next to Description
- Select which sectors you will be promoting on this website
- Select any key advertisers you may be promoting
- Click Add to save your changes
Repeat this process to add additional website. You do not need to create additional publisher accounts to promote advertisers on multiple websites.
You have now completed your publisher profile! Up next, updating payment details and joining advertiser programs.
Questions? Please contact our publisher management team.